the CryptoParty handbook - Version: 2013-08-21 - Back to Index
Using Vpn
In all the VPN systems, there is one computer set up as a server (in an unrestricted location), to which one or more clients connect. The set up of the server is out of the scope of this manual and the set up of this system is in general covered by your VPN provider. This server is one of the two ends of the encrypted tunnel. It is important that the company running this server can be trusted and is located in an area you trust. So to run a VPN, an account is needed at such a trusted server.
Please keep in mind that an account can often only be used on one device at a time. If you want to use a VPN with both your mobile and laptop concurrently, it is very well possible you need two accounts.
There are multiple VPN providers out there. Some will give you free trial time, others will begin charging right away at an approximate rate of €5 per month. Look for a VPN provider that offers OpenVPN accounts - it is an Open Source, trusted solution available for Linux, OS X, and Windows, as well as Android and iOS.
When choosing a VPN provider you need to consider the following points:
- Information that is required from you to register an account - the less that is needed the better. A truly privacy concerned VPN provider would only ask you for email address (make a temporary one!), username and password. More isn’t required unless the provider creates a user database which you probably don’t want to be a part of.
- Payment method to be used to pay for your subscription. Cash-transfer is probably the most privacy-prone method, since it does not link your bank account and your VPN network ID. Paypal can also be an acceptable option assuming that you can register and use a temporary account for every payment. Payment via a bank transfer or by a credit card can severely undermine your anonymity on and beyond the VPN.
- Avoid VPN providers that require you to install their own proprietary client software. There is a perfect open source solution for any platform, and having to run a “special” client is a clear sign of a phony service.
- Avoid using PPTP based VPNs, as several security vulnerabilities exist in that protocol. In fact, if two providers are otherwise equal, choose the one not offering PPTP if feasible.
- Look for a VPN provider that’s using OpenVPN - an open source, multi-platform VPN solution.
- Exit gateways in countries of your interest. Having a choice of several countries allows you to change your geo-political context and appears to come from a different part of the world. You need to be aware of legislation details and privacy laws in that particular country.
- Anonymity policy regarding your traffic - a safe VPN provider will have a non-disclosure policy. Personal information, such as username and times of connection, should not be logged either.
- Allowed protocols to use within VPN and protocols that are routed to the Internet. You probably want most of the protocols to be available
- Price vs. quality of the service and its reliability.
- Any known issues in regard to anonymity of the users the VPN provider might have had in the past. Look online, read forums and ask around. Don’t be tempted by unknown, new, cheap or dodgy offers.
There are several VPN review oriented places online that can help you make the right choice:
- http://www.bestvpnservice.com/vpn-providers.php
- http://vpncreative.com/complete-list-of-vpn-providers
- http://en.cship.org/wiki/VPN
Setting up your VPN client
“OpenVPN [..] is a full featured SSL VPN software solution that integrates OpenVPN server capabilities, enterprise management capabilities, simplified OpenVPN Connect UI, and OpenVPN Client software packages that accommodate GNu/Linux, OSX, Windows and environments. OpenVPN Access Server supports a wide range of configurations, including secure and granular remote access to internal network and/or private cloud network resources and applications with fine-grained access control.” (http://openvpn.net/index.php/access-server/overview.html)
There is a number of different standards for setting up VPNs, including PPTP, LL2P/IPSec and OpenVPN. They vary in complexity, the level of security they provide, and which operating systems they are available for. Do not use PPTP as it has several security vulnerabilities. In this text we will concentrate on OpenVPN. It works on most versions of GNU/Linux, OSX, Windows. OpenVPN is TLS/SSL-based - it uses the same type of encryption that is used in HTTPS (Secure HTTP) and a myriad of other encrypted protocols. OpenVPN encryption is based on RSA key exchange algorithm. For this to work and in order to communicate, both the server and the client need to have public and private RSA keys.
Once you obtain access to your VPN account the server generates those keys and you simply need to download those from the website of your VPN provider or have them sent to your email address. Together with your keys you will receive a root certificate (*.ca) and a main configuration file (*.conf or *.ovpn). In most cases only the following files will be needed to configure and run an OpenVPN client:
- client.conf (or client.ovpn) - configuration file that includes all necessary parameters and settings. NOTE: in some cases certificates and keys can come embedded inside the main configuration file. In such a case the below mentioned files are not necessary.
- ca.crt (unless in configuration file) - root authority certificate of your VPN server, used to sign and check other keys issued by the provider.
- client.crt (unless in configuration file) - your client certificate, allows you to communicate with VPN server.
Based on a particular configuration, your VPN provider might require a username and password to authenticate your connection. Often, for convenience, these can be saved into a separate file or added to the main configuration file. In other cases, key-based authentication is used, and the key is stored in a separate file:
- client.key (unless in configuration file) - client authentication key, used to authenticate to the VPN server and establish an encrypted data channel.
In most cases, unless otherwise necessary, you don’t need to change anything in the configuration file and (surely!) do not edit key or certificate files! All VPN providers have thorough instructions regarding the setup. Read and follow those guidelines to make sure your VPN client is configured correctly.
NOTE: Usually it’s only allowed to use one key per one connection, so you probably shouldn’t be using the same keys on different devices at the same time. Get a new set of keys for each device you plan to use with a VPN, or attempt to set up a local VPN gateway (advanced, not covered here).
Download your OpenVPN configuration and key files copy them to a safe place and proceed to the following chapter.
In the following chapters some examples are given for setting up OpenVPN client software. On any flavor of GNU/Linux use your favorite package manager and install openvpn or openvpn-client package.
If you want to use OpenVPN on Windows or OSX, have look at:
If you use Ubuntu as your operating system, you can connect to a VPN by using the built-in NetworkManager. This application is able to set up networks with OpenVPN. PPTP should not be used for security reasons. Unfortunately at the time of writing a L2TP interface is not available in Ubuntu. (It can be done manually, but it goes beyond the scope of this document).
The following example will explain how to connect with an OpenVPN-server. Under all situations we assume you already have a VPN account as described earlier in this section.
For Ubuntu there is an excellent network utility: Network Manager. This is the same utility you use to set up your Wireless (or wired) network and is normally in the upper right corner of your screen (next to the clock). This tools is also capable of managing your VPNs, but before it can do so, it’s necessary to install some extensions.
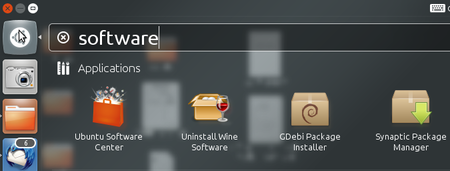
To install the plugins for Network Manager we will use the Ubuntu Software Center.
- Open the Ubuntu Software Center by typing software in the Unity search bar
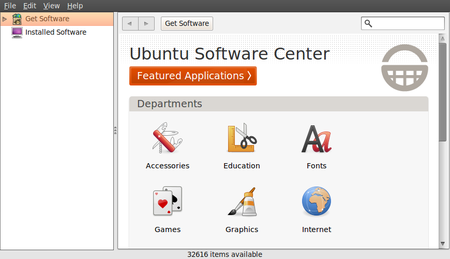
- The Ubuntu Software Center enables you to search, install and remove software on your computer. Click on the search box at the top right of the window.
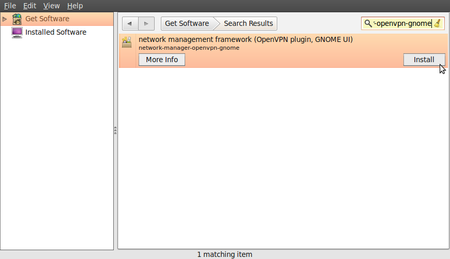
- In the search box, type in “network-manager-openvpn-gnome” (which is the extension that will enable OpenVPN). It’s necessary to type the full names because the packages are classified as “technical” and don’t pop-up earlier. These packages include all the files you need to establish a VPN connection successfully.
- Ubuntu may ask you for additional permissions to install the program. If that is the case, type in your password and click Authenticate. Once the package is installed, you can close the Software Center window.
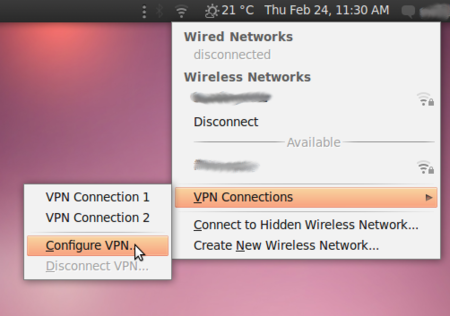
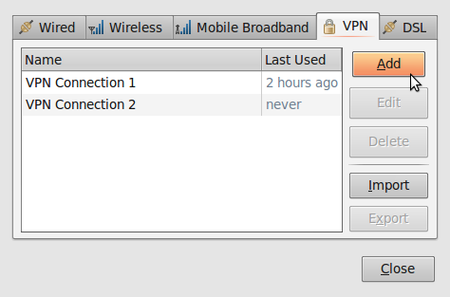
- To check if the extensions are correctly installed, click on the NetworkManager (the icon at the left of your system clock) and select VPN Connections > Configure VPN.
- Click Add under the VPN tab.
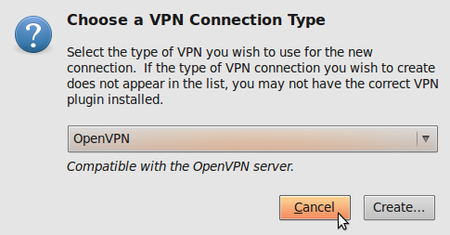
- If you see a pop-up asking for the type of VPN and the tunnel technology (OpenVPN) option is available, this means that you have installed the VPN extension in Ubuntu correctly. If you have your VPN login information ready, you can continue right away, else you first have to get a VPN account from a VPN-provider. If this is the case, click cancel to close the Network Manager.
Let us assume you have received your configuration files and credentials from your VPN provider. This information should contain the following
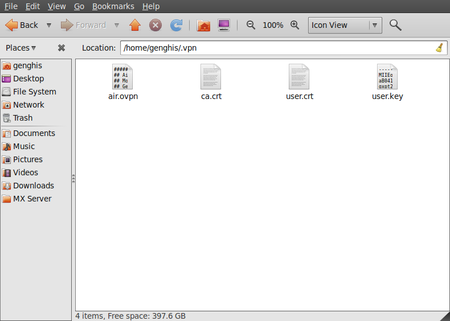
- an *.ovpn file, ex. air.ovpn
- The file: ca.crt (this file is specific for every OpenVPN provider)
- The file: user.crt (this file is your personal certificate, used for encryption of data)
- The file: user.key (this file contains your private key. It should be protected in a good manner. Losing this file will make your connection insecure)
In most cases your provider will send these files to you in a zip file. Some openvpn providers use username and password authentication which will not be covered.
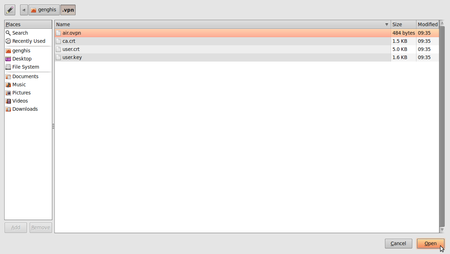
- Unzip the file you have downloaded to a folder on your hard drive (for example “/home/[yourusername]/.vpn”). You should now have four files. The file “air.ovpn” is the configuration file that you need to import into NetworkManager.
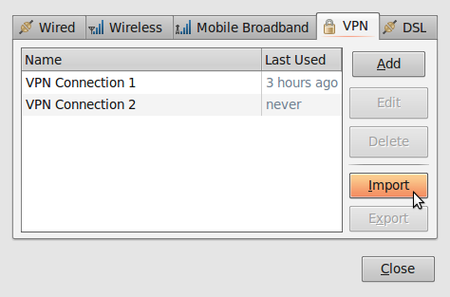
- To import the configuration file, open NetworkManager and go to VPN Connections > Configure VPN.
- Under the VPN tab, click Import.
- Locate the file air.ovpn that you have just unzipped. Click Open.
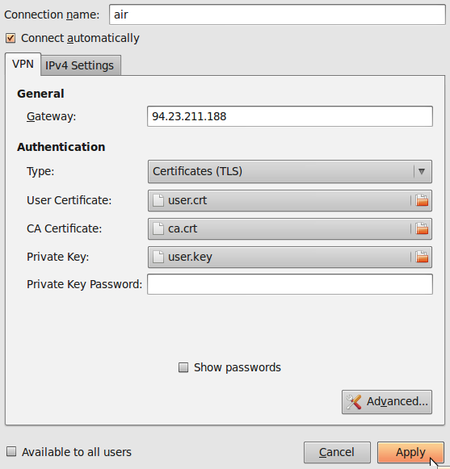
- A new window will open. Leave everything as it is and click Apply.
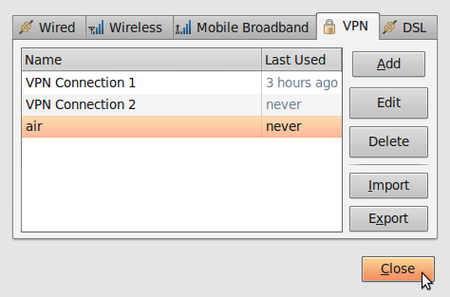
- Congratulations! Your VPN connection is ready to be used and should appear on the list of connections under the VPN tab. You can now close NetworkManager.
Now that you configured NetworkManager to connect to a VPN service using the OpenVPN client, you can use your new VPN connection to circumvent Internet censorship. To get started, follow these steps:
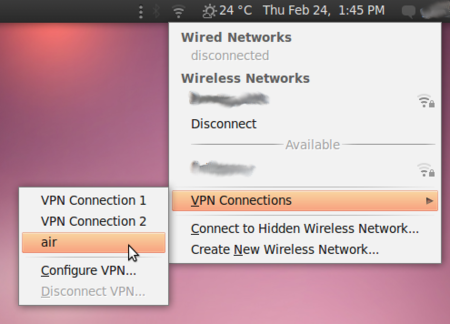
- In the NetworkManager menu, select your new connection from VPN Connections.
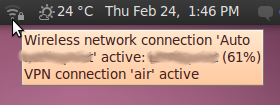
- Wait for the VPN connection to be established. When connected, a small padlock should appear right next to your NetworkManager icon, indicating that you are now using a secure connection. Move your cursor over the icon to confirm that the VPN connection is active.
Test your connection, using the method described in the “Make sure it works” section of this chapter.
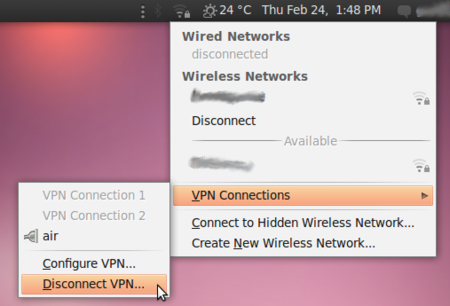
To disconnect from your VPN, select VPN Connections > Disconnect VPN in the NetworkManager menu. You are now using your normal connection again.
Setting up a VPN on MacOSX is very easy once you have your account details ready, Let’s assume have your credentials from your VPN provider for L2TP/IPSec connection ready. This information should contain the following:
- Username, ex.
bill2
- Password, ex.
verysecretpassword
- VPN server, ex.
tunnel.greenhost.nl
- A Pre-Shared-Key or Machine-certificate
Before getting started, please be sure you’ve read the paragraph “testing before and after account set up”, this way you will be able to validate if your connection is actually working after set up.
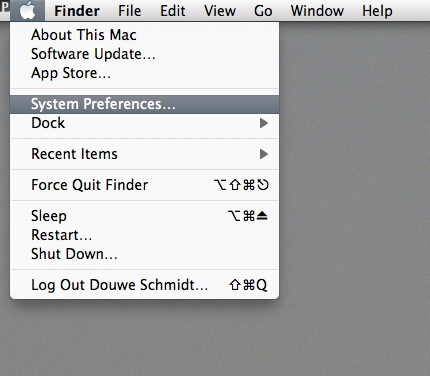
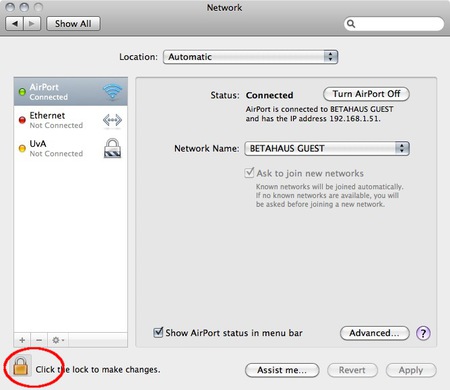
A VPN is configured in the network settings, that are accessible via “System Preferences..” in the Apple menu.
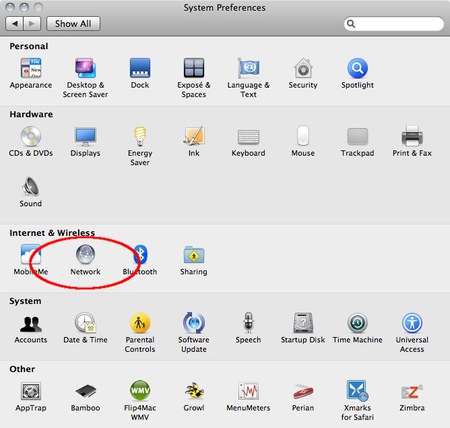
- Next, open the Network preferences.
- OSX uses this nifty system to lock windows. To add a VPN it is necessary to unlock the screen: you can do this by clicking on the lock on the left bottom of the screen.
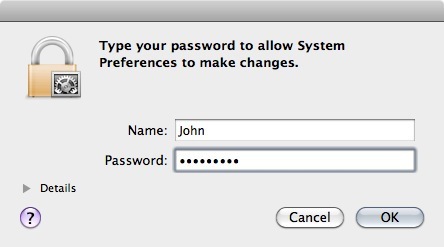
- Enter our user credentials
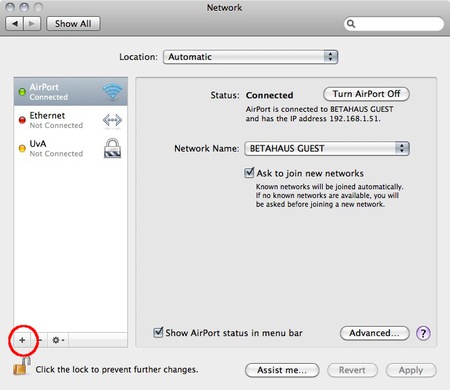
- Now we can add a new network. Do this by clicking on the “+” sign
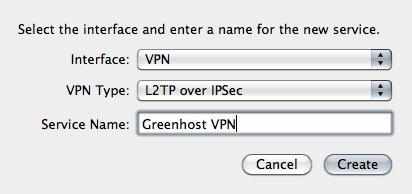
- In the pop-up you need to specify the type of connection. In this case choose an VPN interface with L2TP over IPSec. This is the most common system. Also don’t forget to give the connection a nice name.
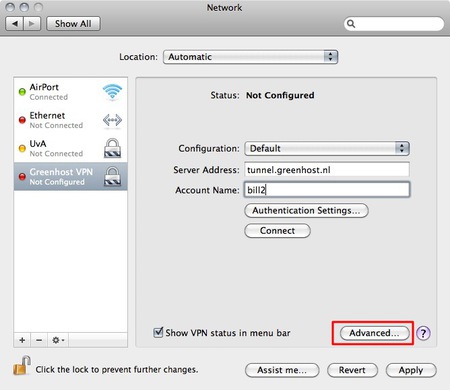
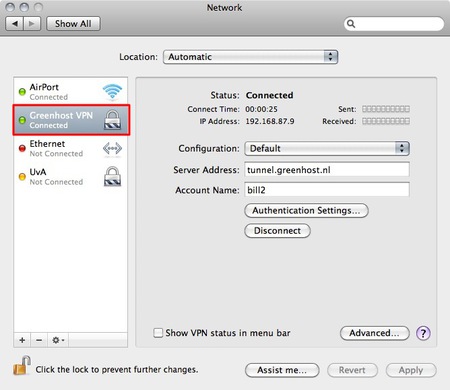
- Next comes the connection data. Please fill in the provided server name and user name (called ‘Account Name’). If this is done, click on the “Authentication Settings…” button
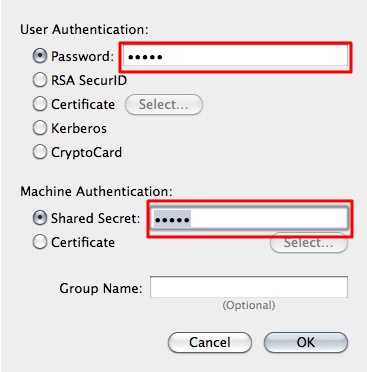
- In the new pop-up you can specify connection specific information. This is the way the user is authenticated and how the machine is authenticated. The user is very commonly authenticated by using a password, although other methods are possible. Machine authentication is often done by a Shared Secret (Pre-Shared-Key/PSK), but also quite often by using a certificate. In this case we use the Shared Secret method. When this is done click OK.
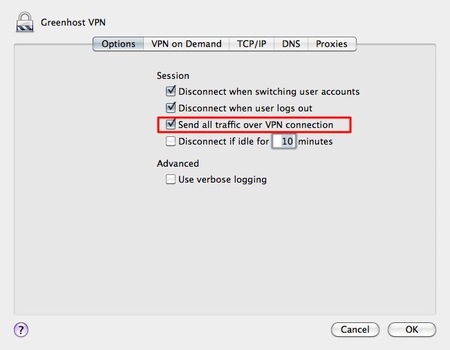
- Now you return back to the network screen. The next step is very important, so click on “Advanced…”
- In the new pop up you will see an option to route all traffic through the VPN connection. We want to enable this, so all our traffic is encrypted.
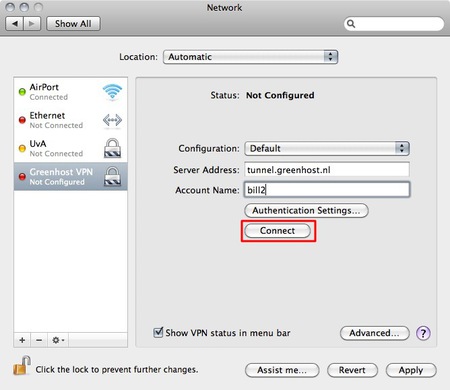
- Well, all is done. Now hit the Connect button!
- A pop-up appears. You need to confirm your changes, just hit “Apply”
- After a few seconds, on the left side the connection should turn green. If so, you are connected!
- Ok, now test your connection!
Setting up a VPN on Windows is very easy once you have your account details ready. Let’s assume have your credentials from your VPN provider for L2TP/IPSec connection ready. This information should contain the following:
- Username, ex.
bill2
- Password, ex.
verysecretpassword
- VPN server, ex.
tunnel.greenhost.nl
- A Pre-Shared-Key or Machine-certificate
Before getting started, please be sure you’ve read the paragraph “testing before and after account set up”, this way you will be able to validate if your connection is actually working after set up.
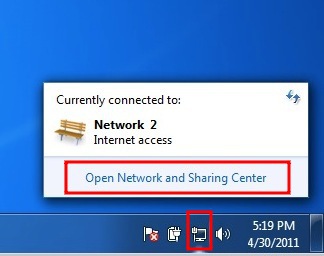
We need to go to the “Network and Sharing Center” of Windows to create a new VPN connection. We can access this center easily by clicking on the network icon next to the systemclock en click on “open Network and Sharing Center”
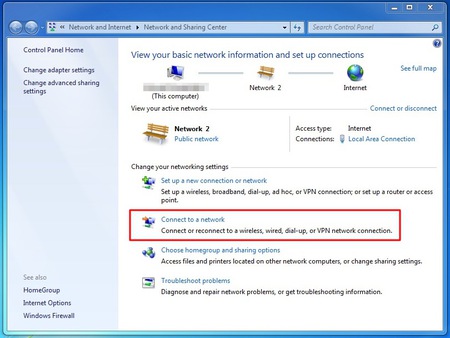
- The “Network and Sharing Center” will popup. You will see some information about your current network. Click on “Connect to a network” to add a VPN connection.
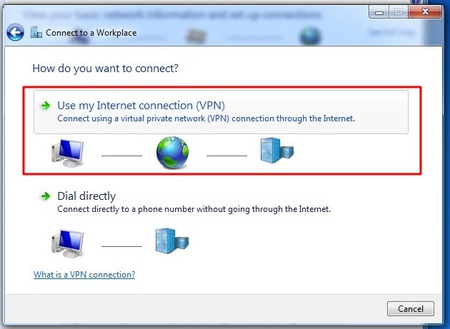
- The wizard to setup a connection will popup. Choose the option to “connect to a workplace”, which is Microsoft’s way of naming a VPN connection.
- The next screen asks us if we want to use our Internet connection or an old-school phone line to connect to the VPN. Just choose the first option then.
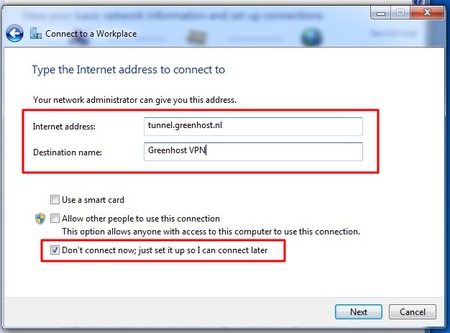
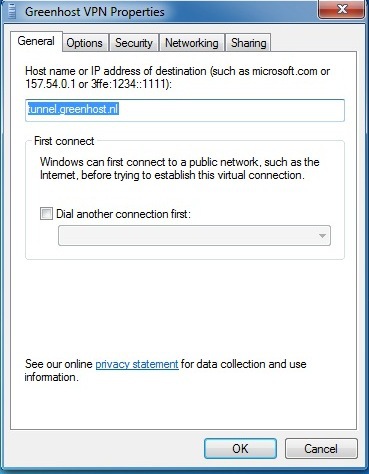
- The next screen asks for the connection details. Enter here the server of your VPN-provider (called “Internet address” in this dialog). On the bottom please check the box “Don’t connect now; just set it up”. Using this option the connection will be automatically saved and it’s easier to control extra settings. If this is all done, hit the “next” button
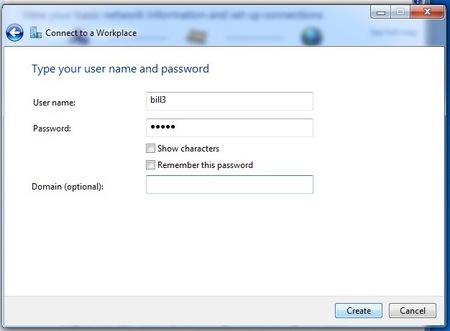
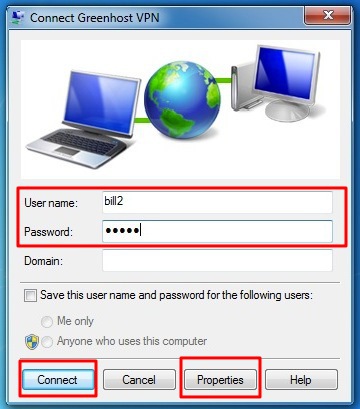
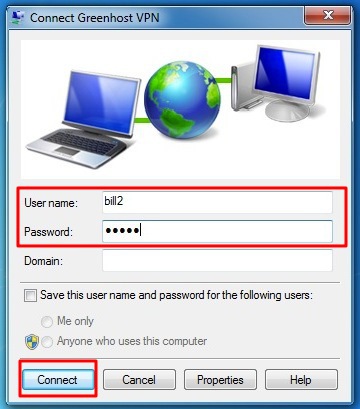
- Next up are your username and password. Just give them like you received them from your VPN-provider. If the connection fails, Windows forgets them. So keep them with you, you maybe need them later. If this is done. Click “create”.
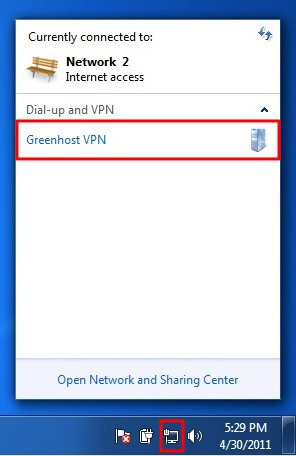
- Your connection is now available, if you click the the network icon again, you will see a new option in the network menu, the name of your VPN connection, just click it to connect.
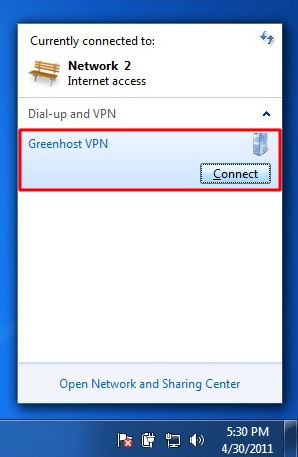
- And click “connect”
- A VPN connection dialog appears. This give us the opportunity to review our settings and to connect. You can try to connect, Windows will try to discover all other settings automatically. Unfortunately, this does not always work, so if this is not working for you, hit the “properties” button.
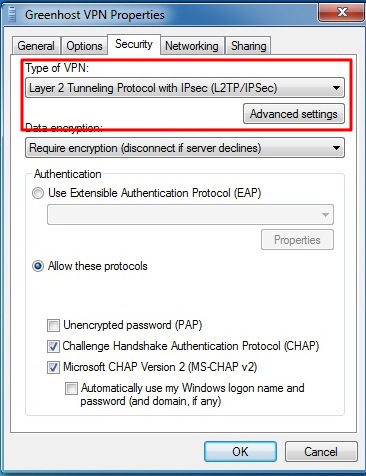
- The properties windows appear. The most important page is the “Security” page, click on the Security tab to open it.
- In the security tab you can specify VPN type, normally L2TP/IPSec. Do not use PPTP as it has several security vulnerabilities. For L2TP/IPSec also have a look at the Advanced settings.
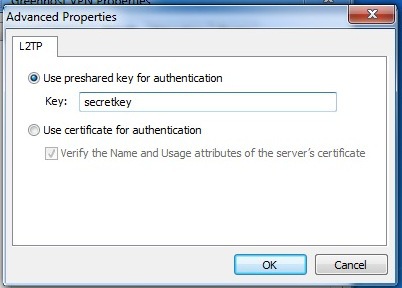
- In the Advanced Settings window, you can specify if you are using a pre-shared key or a certificate. This depends on your VPN-provider. If you have received a pre-shared-key, Select this option and fill in this key. Hit ok afterwards. You will return to the previous window, click ok there also
- Back in to connection window try to connect now. Please be sure your username and password are filled out.
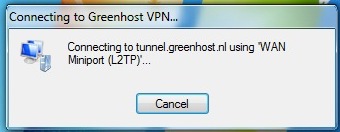
- A connection popup will appear
- Online! Don’t forget to check if your VPN is working properly.
Once you’re done setting up your VPN, one of the first things you should do is test whether your data is actually being transferred through your VPN network. The simplest way to test this is to check your public IP address, which is the IP address you’re exposing to the internet.
There are numerous websites that will tell you what your IP address is, and where that IP address is located (also known as its geolocation). Many search engines will report your IP address if you search for “My IP,” but you can also use dedicated services like http://www.myip.se and http://www.ipchicken.com.
Check your IP address before connecting to your VPN. Once you connect to your VPN, your computer’s public IP address should change to match that of your VPN server, and your geolocation should change to wherever your VPN server is located.
Once your external IP is the same as the IP of your VPN server, you can rest assured your communication is encrypted.
the CryptoParty handbook - Version: 2013-08-21 - Back to Index